IBM MQ Configuration (Formerly WebSphereMQ)
This topic describes how to install IBM MQ on your system and set up a basic configuration.
Install IBM MQ and IBM MQ Explorer
Download and Install IBM MQ
Go to the IBM MQ Downloads page.
Select the appropriate installer for your operating system.
Run the installer and follow the on-screen instructions to complete the installation.
Download and Install IBM MQ Explorer
Go to the IBM MQ Explorer installation page.
Download the installer for your platform.
Run the installer and complete the setup process.
Open IBM MQ Explorer
Launch IBM MQ Explorer after installation.
To set up a basic configuration, follow the steps in the Create a Queue Manager section.
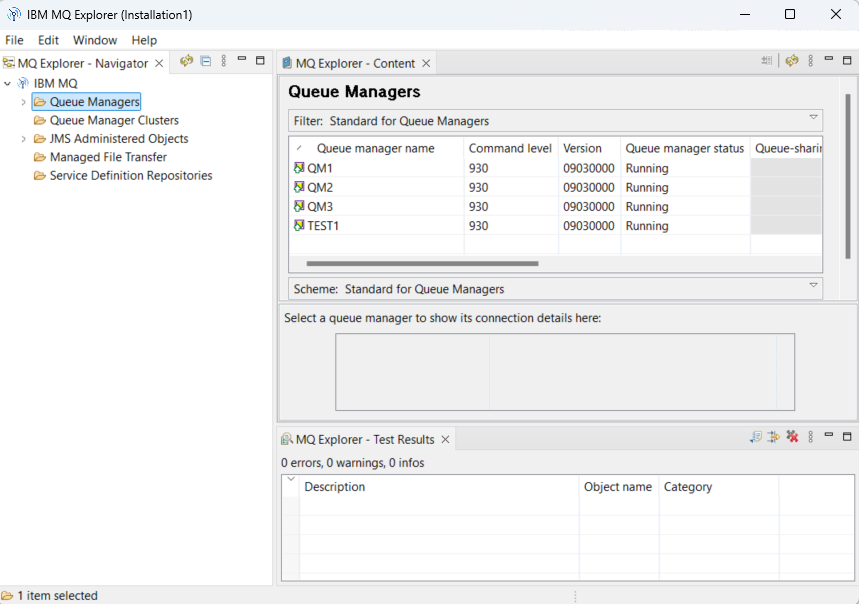
Create a Queue Manager
Create a queue manager before creating a queue. The queue manager handles application connections, manages queues, executes commands, triggers events, and routes messages to the correct queues. To create a queue manager:
Create a New Queue Manager: In the Navigator panel, right-click Queue Managers and select New > Queue Manager.

Specify a Name: Enter a name for the queue manager. Use this name later when you configure destinations.
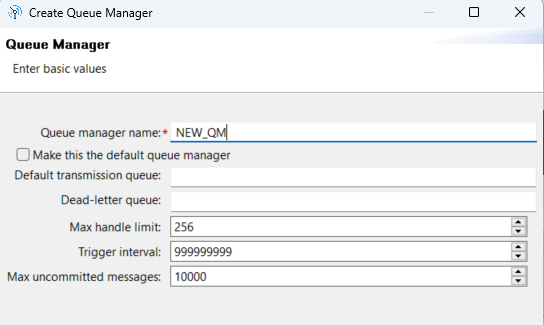
Configure Port Settings: Click Next three times to accept the default settings until you reach the Listen on port number field. Enter your port number, or keep the default
1414if it applies to your setup.Finish the Setup: Click Finish to create the queue manager. If the Finish button is inactive, the selected port is already in use. In this case, select a different port to continue.
Create a Queue
In IBM MQ, queues are used to store and manage messages. Once an application is connected to a queue manager, it can retrieve or add messages to a queue. To create a queue:
Create a New Queue: In the Navigator panel, right-click QueueManagerName > Queues and select New > Local Queue.

Specify a Queue Name: In the New Local Queue dialog, enter a name for the queue.
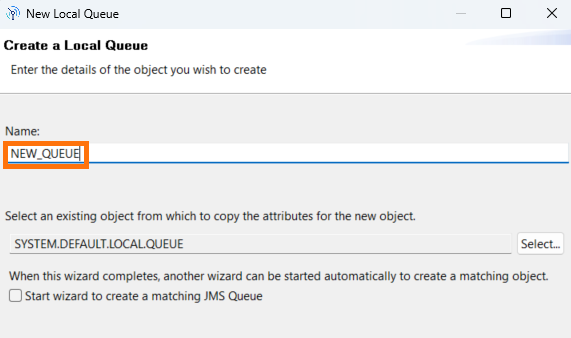
Finish the Setup: Click Finish to create the queue with the default settings. Alternatively, click Next to configure advanced queue properties.
Create a Server-Connection Channel
A server-connection channel enables communication between MQ clients and servers. It allows remote applications (clients) to connect to an MQ queue manager. Configure this channel on the server and use TCP/IP for client-server communication. To create a server-connection channel:
Create a New Server-Connection Channel: In the Navigator panel, right-click Channels under QueueManagerName. From the context menu, select New, then click Server-connection Channel.
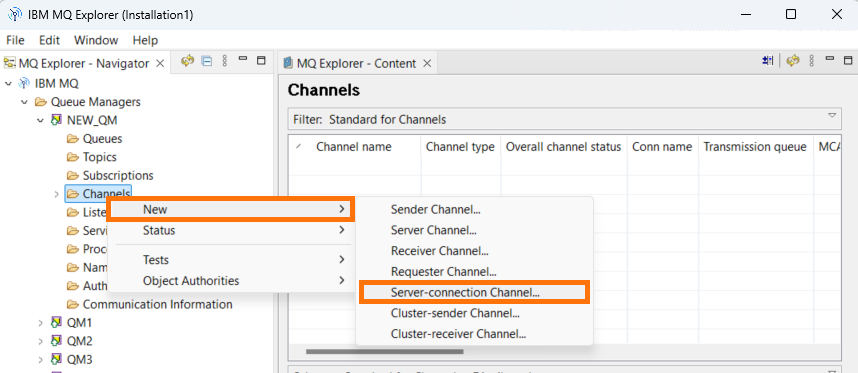
Specify a Channel Name: In the New Server-connection Channel dialog, enter a name for the channel.
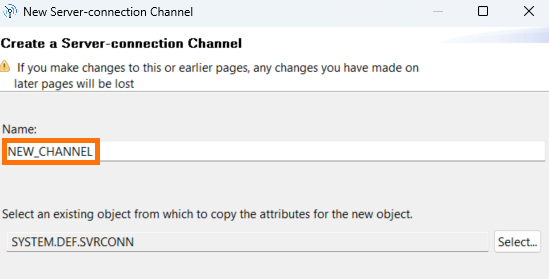
Finish the Setup: Click Finish to create the channel with the default settings. Alternatively, click Next to configure advanced channel properties before finalizing the creation.
Create an Initial Context
An initial context defines connection details and enables name resolution. Without it, the application cannot connect to a queue. To create an initial context:
Add Initial Context: Right-click JMS Administered Objects, and then click Add Initial Context.
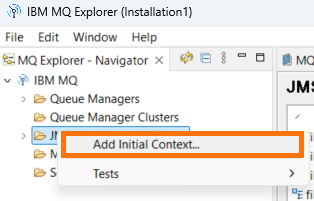
Select File System Option: In the Add Initial Context dialog, select the File System option.
Specify the Binding Directory: In the Binding directory field, specify the path to an empty folder.
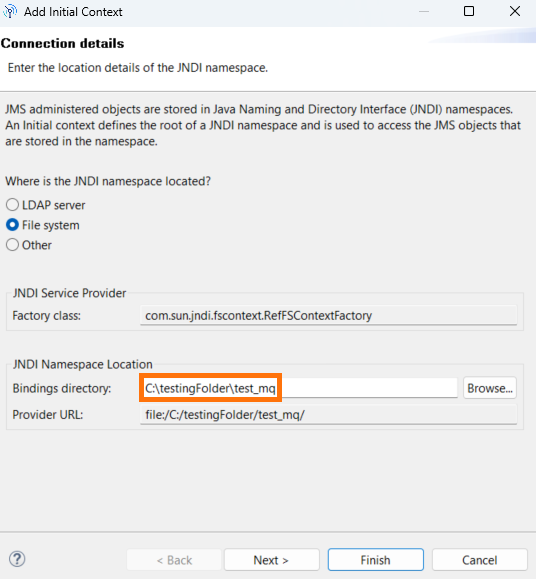
Finish the Setup: Click Finish to complete the setup.
Important
Make sure to save the Factory class and Provider URL values so you can use them when creating a plugin or establishing a manual connection.
Create a Connection Factory
A connection factory is a Java object that clients use to create a connection to the JMS provider. To create a connection factory in IBM MQ:
Add a New Connection Factory: Right-click Connection Factories under Initial Context, and then select New and choose Connection Factory from the submenu.
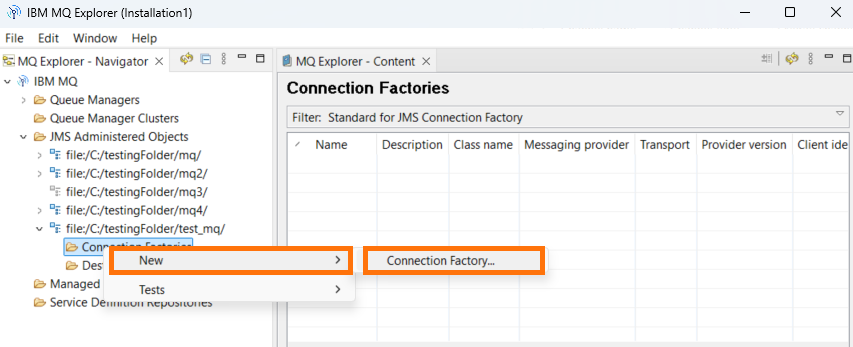
Specify a Factory Name: In the New Connection Factory dialog, enter the name of the connection factory.
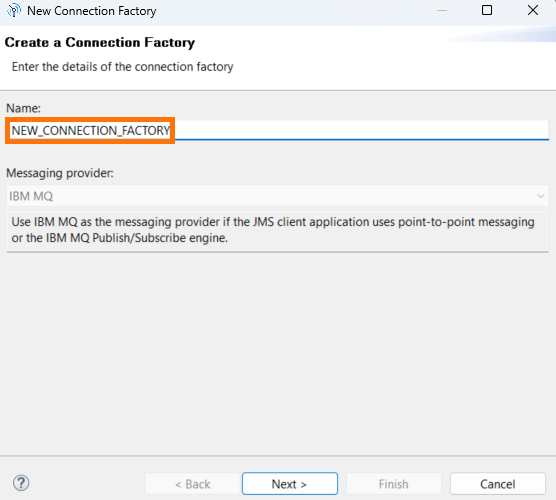
Important
Save the connection factory name. You will need it when creating a plugin or establishing a manual connection.
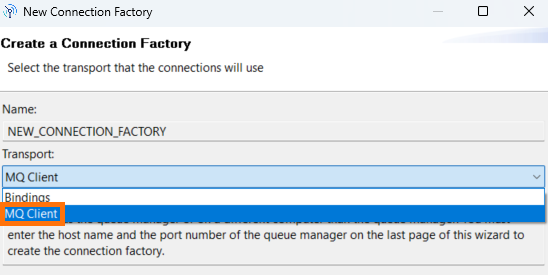
Configure Transport Settings: Click Next twice to reach the Transport section, then select MQ Client from the drop-down list.
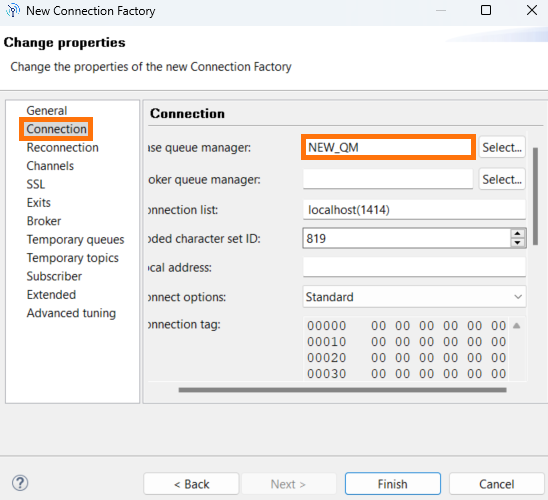
Configure Connection Properties: Click Next twice to reach the Connection property section. Select Base Queue Manager, and choose the queue manager name created in Step 2: Specify a Name of the Create a Queue Manager procedure.
Configure Channel Properties: Click Channels property, and in Channel, select the queue manager created in the Create a Queue Manager procedure.
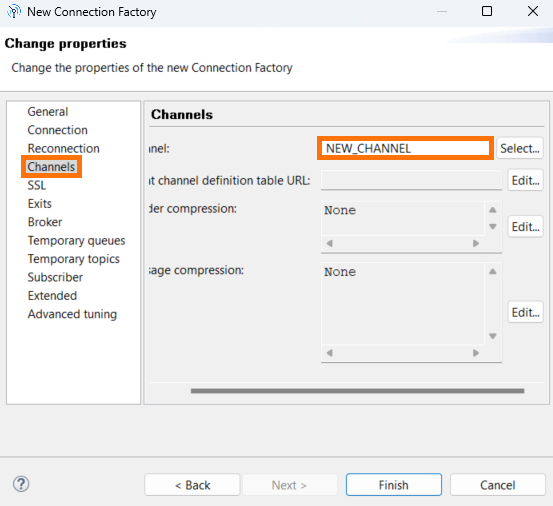
Finish the Setup: Click Finish to complete the factory setup of the connection.
Create Destinations for Queues
Destinations define the target queues that applications interact with. To create a destination for a queue in IBM MQ:
Add a New Destination: In the Initial Context folder, right-click Destinations. Select New, then choose Destination from the submenu.

Specify a Destination Name: In the subsequent dialog, enter a name for the destination. Then, click Next twice to proceed.
Configure Queue Manager and Queue: First, in the Queue manager field, enter the name of the queue manager you created earlier. Next, in the Queue field, enter the queue name you created earlier.
Finish the Setup: Close the dialog.
Configure SSL Connection between IBM MQ and ReadyAPI
Note
This step is optional and only necessary if you require an SSL connection.
Set up Keystore and Truststore
Set up the client's keystore and the server's truststore.
You can refer to the following resources:
If you have a JKS file for the client and a KDB file for the server, proceed with the configuration in IBM MQ Explorer.
Configure SSL in IBM MQ Explorer
Open Queue Manager Properties
Right-click your queue manager and select Properties.
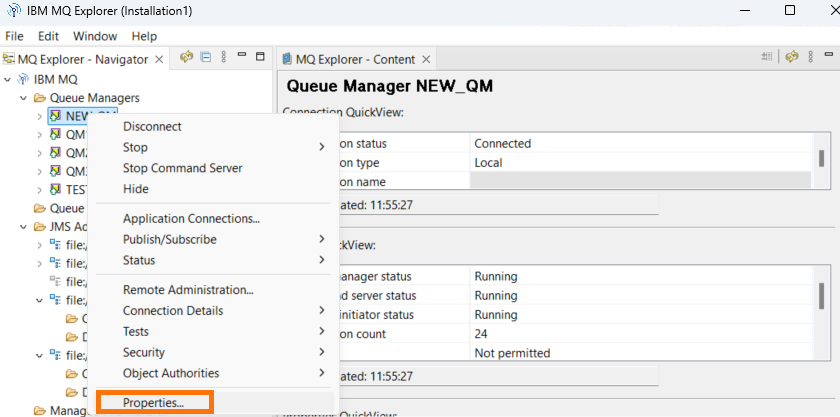
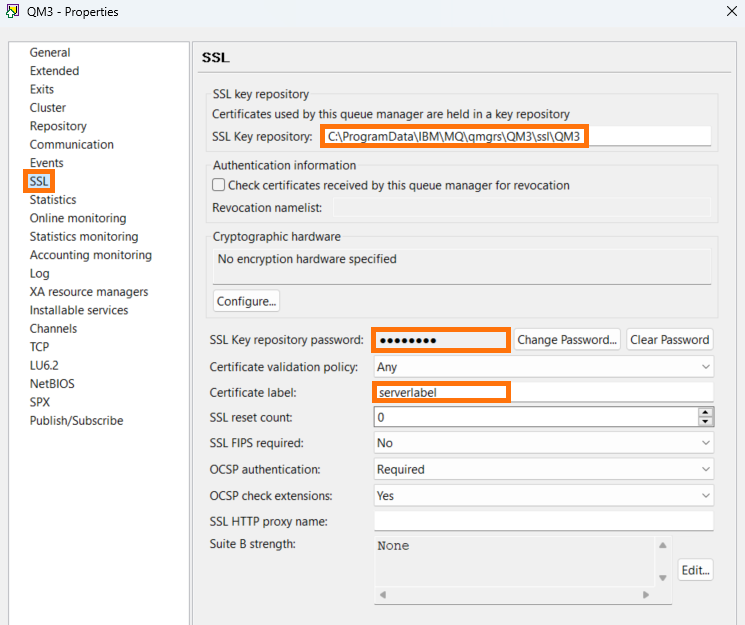
Click on SSL.
Specify SSL Settings
In the SSL Key repository field, enter the path to the server keystore (for example,
QM3.kdb).In the SSL Key repository password field, enter the password for the keystore file.
In the Certificate label field, enter the label used when creating the KDB file.
Configure the Server-Connection Channel
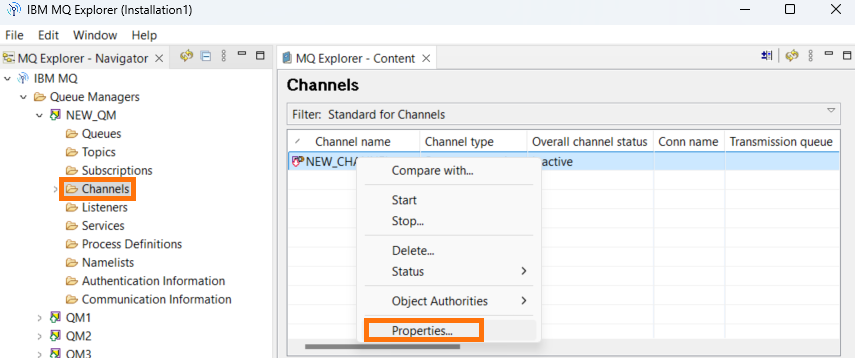
Open Channel Properties
Expand Channels under your queue manager, then right-click the server-connection channel and select Properties.
Specify SSL Channel Settings
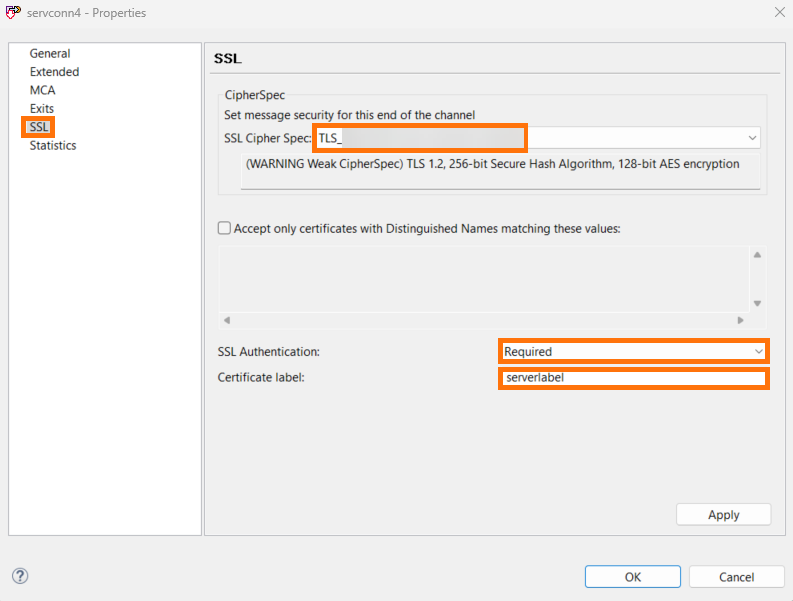
Go to the SSL tab.
Select the SSL Cipher Spec.
Choose SSL Authentication as Optional or Required. If you select Required, also specify the Certificate label.
Configure Connection Factories
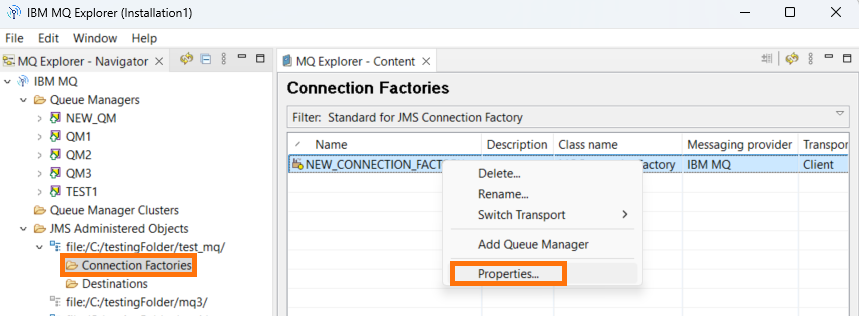
Open Connection Factory Properties
Right-click Connection Factories under the Initial Context and select Properties.
Configure SSL Settings
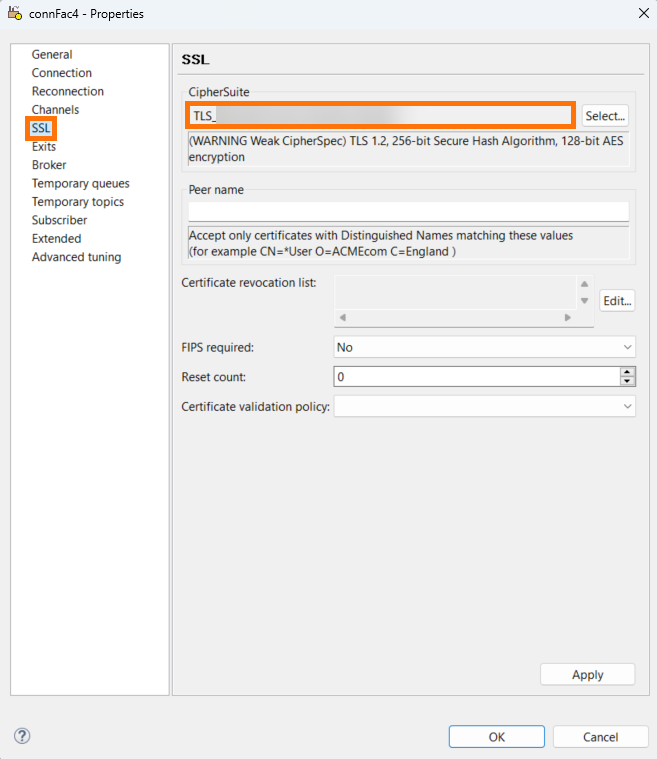
Click SSL.
Set the CipherSuite to match the one selected in the channel configuration.
Restart the Queue Manager
Configure SSL in ReadyAPI
Add Required Libraries
Manually add the required libraries to the
extfolder.Alternatively, add the plugin following the Create a Plugin approach in ReadyAPI.
Configure SSL Options
If the truststore and keystore contain only IBM MQ certificates, do the following:
Create a
ssl.propertiesfile and include the following:com.ibm.ssl.keyStore=<path_to_keystore> com.ibm.ssl.keyStoreType=JKS or PKCS12 com.ibm.ssl.keyStorePassword=<keystore_password> com.ibm.ssl.trustStore=<path_to_truststore> com.ibm.ssl.trustStoreType=JKS or PKCS12 com.ibm.ssl.trustStorePassword=<truststore_password>
Add the following VM options to the
ReadyAPI.vmoptionsfile:-Dcom.ibm.ws.sib.client.ssl.properties=path/to/ssl.properties -Dcom.ibm.mq.cfg.useIBMCipherMappings=false
If the truststore and keystore contain multiple certificates (not only IBM MQ), do the following:
Add these VM options directly:
-Dcom.ibm.mq.cfg.useIBMCipherMappings=false
-Djavax.net.ssl.keyStore=<path_to_keystore>
-Djavax.net.ssl.keyStorePassword=<keystore_password>
-Djavax.net.ssl.trustStore=<path_to_truststore>
-Djavax.net.ssl.trustStorePassword=<truststore_password>
Restart ReadyAPI: Restart the application to apply the new SSL settings.
For more information, see the IBM MQ SSL Documentation.